
Member Login
|
|
home | faqs | join now | try free version |
Member Login
|
Clipart and Photo Editing Techniques for Greeting Cards |
||
"Transforming 2D into 3D" |
||
|
A lot of free clipart or clipart that can be used commercially via a royalty-free licence, is often provided as 2D style graphic images. But if you can assign your 2D images with some 3D attributes, it can transform your cards into something beautiful, resulting in very professional looking greeting cards.
Selecting the Proper Image and ResolutionVery simply put, if you are creating a greeting card to act as an ecard that you'll share via email or through facebook, then images with screen resolutions from 79dpi to 100 dpi will do fine. On the other hand, if your intention is to create a printed greeting card, you might want to ensure the images you select are 300dpi or greater. You'll also want to consider the orientation of the card you wish to create. Most cards are created in portrait style, meaning the cards are taller than they are wide. Alternatively, a card created in landscape style is wider than it is tall. Either way, you'll want to consider the final card orientation when selecting a picture for the card. Prepping The Initial ImageWhen selecting clip art, it works best if you can use a .png or .gif image to start, so that you might already have a transparent background, or could at least easily establish one. If your initial clipart image has a solid white background image, take these steps to remove the background: 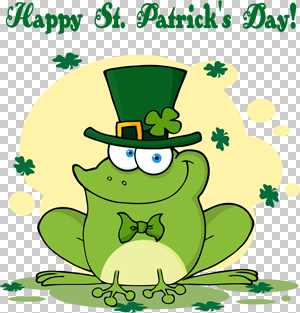
Starting Image
Break The Clipart into Layers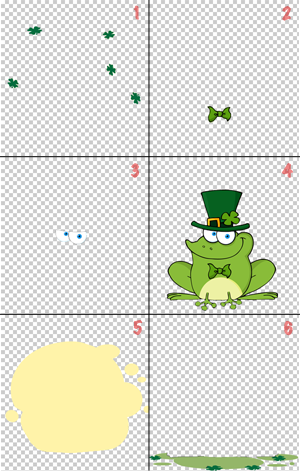
Six Layers The key to turning 2D clipart into virtual 3D clipart is in breaking as many things apart as possible in the image. Depending on the image, this might include multiple items, or just the one main item. When looking at our image, we chose to cut to a layer or isolate the partial yellow background, isolate the floating shamrocks, and isolate the ground. This left the frog isolated by itself, but then we also chose to copy to layer or isolate the frog's eyes and bow tie. All together, this resulted in six distinct layers being created from the original image. If you question whether it is better to copy or cut when creating a layer, we generally recommend that you cut because this leaves less on the original to work with as you cut additional layers, eventually leaving your main item as a layer with all the others things cut away. An exception is when you are lifting something in front of your main object, as we did for the eyes and bow tie in layer 2 and 3. You'll notice that in layer 5 and 6, we filled in the space left by the missing frog and shamrocks. This is necessary because when we add special effects such as bevel or shadow, the edges for the missing area would create this effect as well, and that could create problems with the final image. You'll also notice in layer 4 that we removed the text above the frogs head since we'll want better control later when we add our own. Add Depth Enhancing Special Effects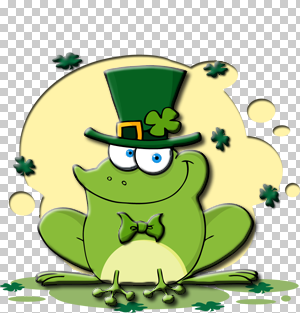
Image Effects Using a combination of bevel and drop shadows, you can enhance an otherwise flat image into appearing somewhat 3D and provide the perception of depth to an image. When adding these effects, it is best to place the established light direction to the left and to the top. This results in shadows falling to the right and to the bottom. For layers 1,2 3 and 4, we added bevel emboss and drop shadow with the light source on the upper left hand side. This immediately pulls the frog and shamrocks forward. For layer 5, we reversed the direction of bevel and used no drop shadow. The result is the added effect of deeper depth, such as having dug a hole into the background. Then, for layer 6, we added no effects at all and just let the item sit as a floor or base. Add Textures to Specific Items or BackgroundsTo add a little extra flair, we added texture to the sunken yellow background. To do this we first added an overlay of a texture called 'canvas'. By itself this is fine, but we didn't want the background so well defined, so we swept that texture with another filter called 'angled strokes'. That served to soften the look and give it an almost plaster appearance.
Finished Product Next we enlarged the canvas size to the proper portrait proportion for the card we were making. Then we added a final background layer that goes behind everything and painted the layer a light bluish green color. again, not being satisfied with a flat color, we did a canvas texture overlay and then smeared that with a filter called 'smudge stick', which gave the background a unique appearance, almost metallic. Add Text Title or MessageFinally, we added a message to the upper portion of the card to convey our wishes for a Happy St. Patrick's Day. We used a font called 'Romulus' and colored it the same primary color of the frog. We then added just a hint of shadow, and chose not to emboss the text but to leave it as it is. Then to finish off the card, we flattened all the layers together, having first saved a full copy where all layers are present. As a single layer, we then embossed the whole layer to provide a frame around the image and saved the image in .png format to preserve the variety of color best. <- Main Index |
<- Main Index |
|
|
© copyright 2003 - 2024 - CreateEcards.com & David Nelmes |
|||